Join Seamlss #
Check out our Register Now help page for more details on how to sign up for Seamlss with a unique email and mobile number. We recommended using your Xero email for easy sign-in using Xero after the initial setup.
Note: If you sign up to Seamlss through the Xero app store, Xero will recieve 15% of the subscription fees.
Signing Up #
Start by filling out the details on the sign-up page.

Once the form is filled out, click Register and we’ll send you a confirmation email.
Welcome and Confirmation #

Once you have joined Seamlss, you will receive an email asking you to confirm the email address you registered with before you can continue. Open the email and click on the link – this will open your browser and take you to the email confirmation page. (Note: If you haven’t received an email after a few minutes, please also check your junk folder and mark it as Not Junk if it has gone in there.)

On the email confirmation page, click on the Please return to the login page link. Simply enter the email and password you just created to log in and go to your dashboard. If you need to, you can reset your password by clicking on the Forgot your password? link.

(If you missed the email confirmation sent earlier, click here to resend it. You won’t be able to register again for security purposes.)
Complete Branding Setup #
When you first log in, you are taken to the welcome screen on your dashboard. You will be invited to complete a few final tasks including setting up your brand to finalise your onboarding with us.

Brand settings and display #
Click on the first step, Setup your brand, to add your organisation logo, email, and brand colour. You can update your branding at any time by clicking on Settings in the menu on the left-hand side of the screen.

Start by filling out your firm’s name and email.
The Organisation Name will determine how your firm’s name is displayed in various areas of Seamlss.
Organisation Email is the email address your clients will reply to when interacting with Seamlss emails. We recommend you enter the email address of the team member who handles your onboarding process.
Click on the Replace Logo button under the Seamlss logo and upload an image of your firm’s logo. This will appear in emails and landing pages that clients will see when interacting with your firm and Seamlss.
Now change the colour to match your firm’s brand colours. Your main brand colour is applied to buttons and minor areas such as borders and horizontal divides. Combined with your logo, it gives clients a sense of familiarity in their Seamlss experience.
Click on Main Brand Colour to bring up the colour picker. If you know the RGB values of your branding colour, you can enter them manually for precise branding. By clicking on the up/down arrows, you can toggle between RBG, HSL, and HEX modes. Alternatively, you can use the dropper to select a colour from your logo. You can also change the colour by clicking anywhere on the colour picker and adjusting the slider to change the hue, although doing so could result in less consistent branding. We recommend sticking with a colour from your logo.

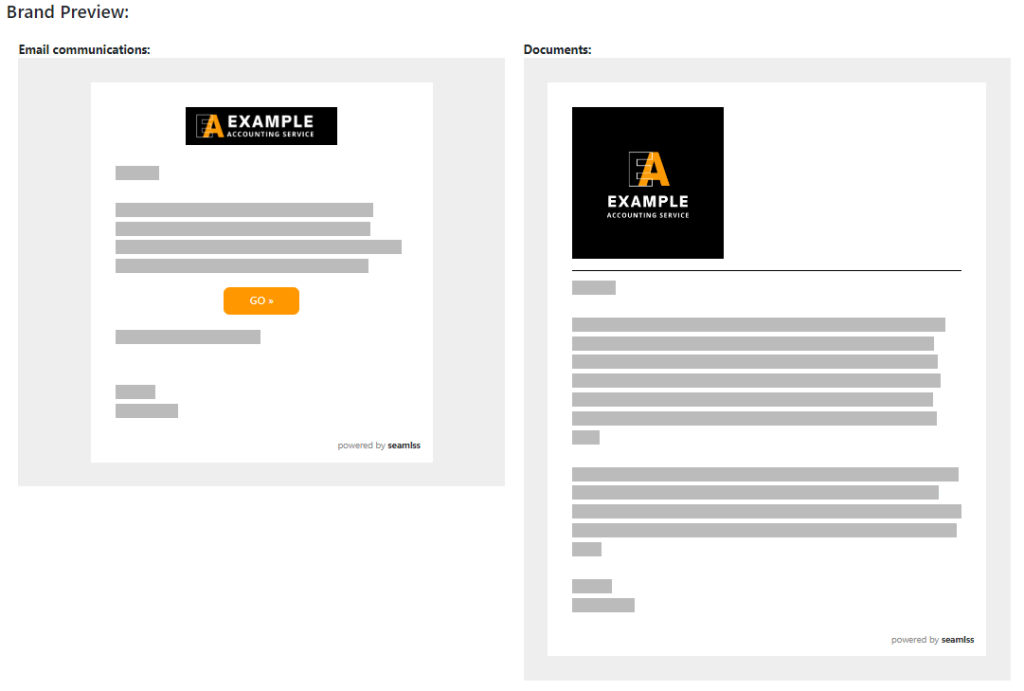
A preview of how your branding will appear in Seamlss emails and documents is displayed at the bottom of the page.
Save Settings and move to the General settings tab.

Turn on Show agent linking instructions. This means when a client adds entities during the onboarding process, they will be shown instructions on how to link to your firm using the Relationship Authorisation Manager (RAM).
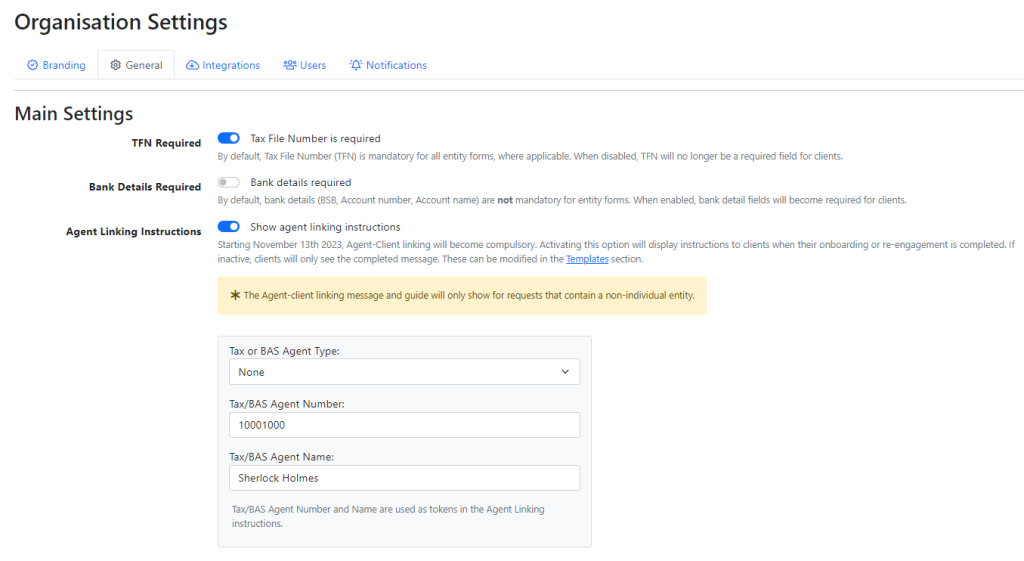
Fill out the Tax/BAS agent details and click the blue Save Setting button.
Return to your Dashboard to continue.

Customise your communication messages #
Clicking on Dashboard will return you to the welcome page where you can continue with the next stage of onboarding.

Here you can Modify email template content for your clients.
When you click on Customise your communication messages, you will be taken to the Comms tab where you can edit the email template for client welcome emails – this is the email they receive when you request to onboard them with your firm using Seamlss. You can also access the Comms tab by clicking Templates on the left-hand menu.
Change the template content to suit the tone of your firm. You can select other templates or your email signature from the drop-down menu

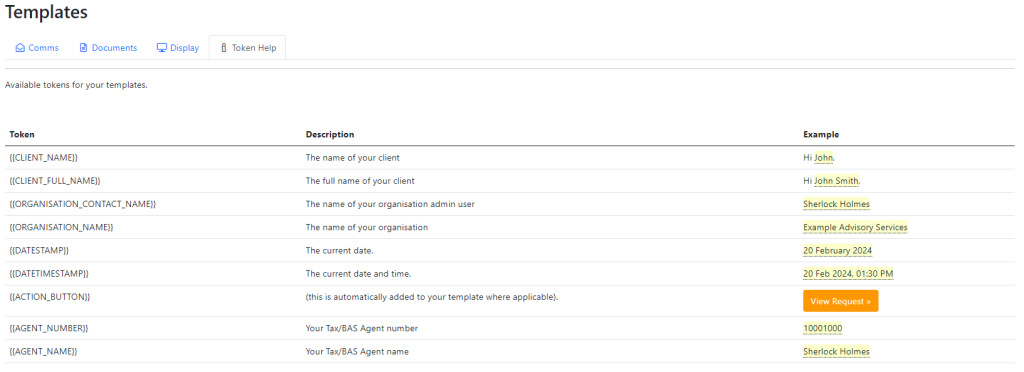
Use the Token Help tab to view the available tokens you can include in your templates. A token is a field that will be automatically customised by Seamlss for every email you send.
For example, if you use “Dear {{CLIENT_NAME}}” at the start of your template and you send an email to onboard Mary Jane, she will see “Dear Mary Jane” at the top of her welcome email. {{DATESTAMP}} will automatically convert to the date the email is sent.
In the Comms tab, return to the drop-down menu and select Email Signature. This is where you can customise the firm’s email signature that appears at the bottom of all emails sent out to clients.

Edit Documents & Engagement Letter #
Now click on the documents tab in the templates area.
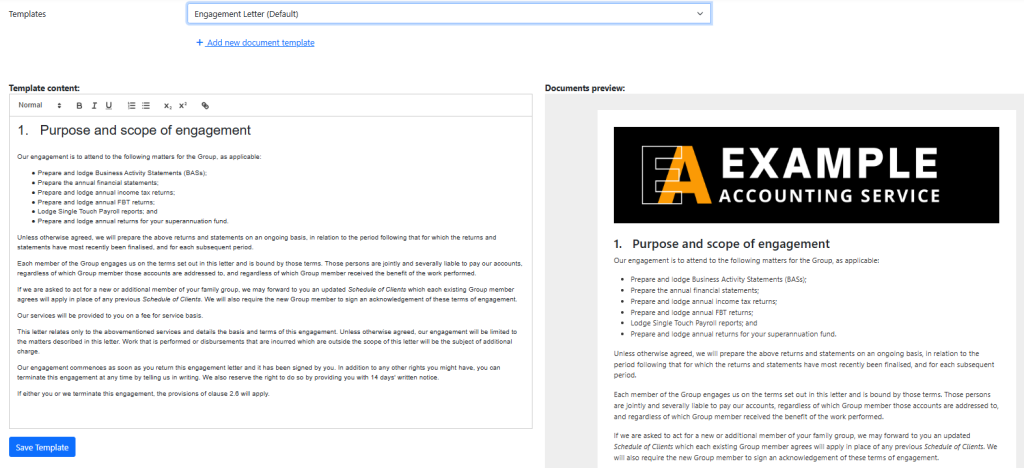
It’s important for all firms to adjust the engagement letter to suit your firm’s needs. Clients will be signing this engagement letter digitally when onboarding. We have highlighted certain areas of the template to help you locate key things that need changing. You will need to decide if you have to keep or delete these areas.

At the top of the Template content field are a series of tools to help you customise your template. You can also copy and paste your own engagement letter into this field.

Use the Documents preview window on the right to see what the Engagement Letter will look like when generated into a PDF, after being signed by clients.
If you need multiple engagement letters, you can create additional templates by clicking Add new document template.

Notification Recipients #
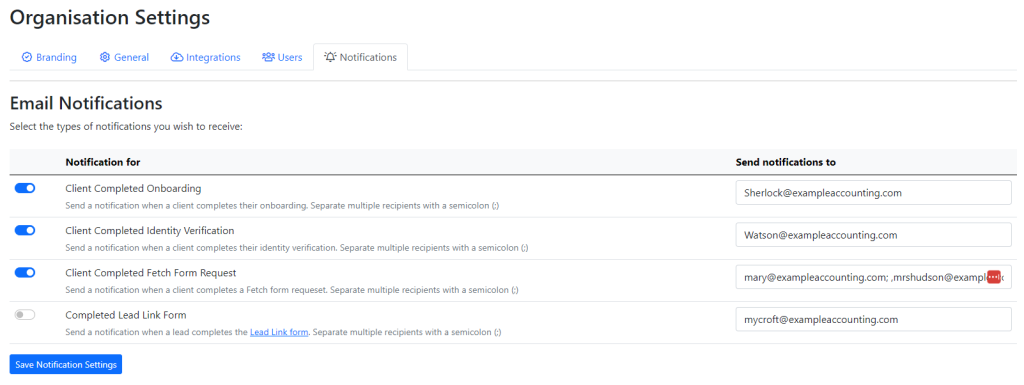
Return to the Dashboard and click Set your notification recipients.

You can turn on and off the types of notifications you would like to receive, and specify different email addresses for each type of notification if you would like different members of your team to receive certain notifications. You can add multiple email addresses for each type of notification, just separate the recipients with a semicolon (;)
Two Factor Authentication (2FA) Security #
Finally, we recommend you return to the dashboard to set up 2FA (Two-Factor Authentication) with your Seamlss account as an added security measure.

2FA utilises an additional form of account verification on top of the email and password to help ensure client information remains secure. By not setting up 2FA on your account, it can potentially be compromised by means of stolen login credentials, especially with a weak password.
Click on the Add authenticator app link. Use your current authenticator app, like Google Authenticator, Microsoft Authenticator, or Practice Protect.

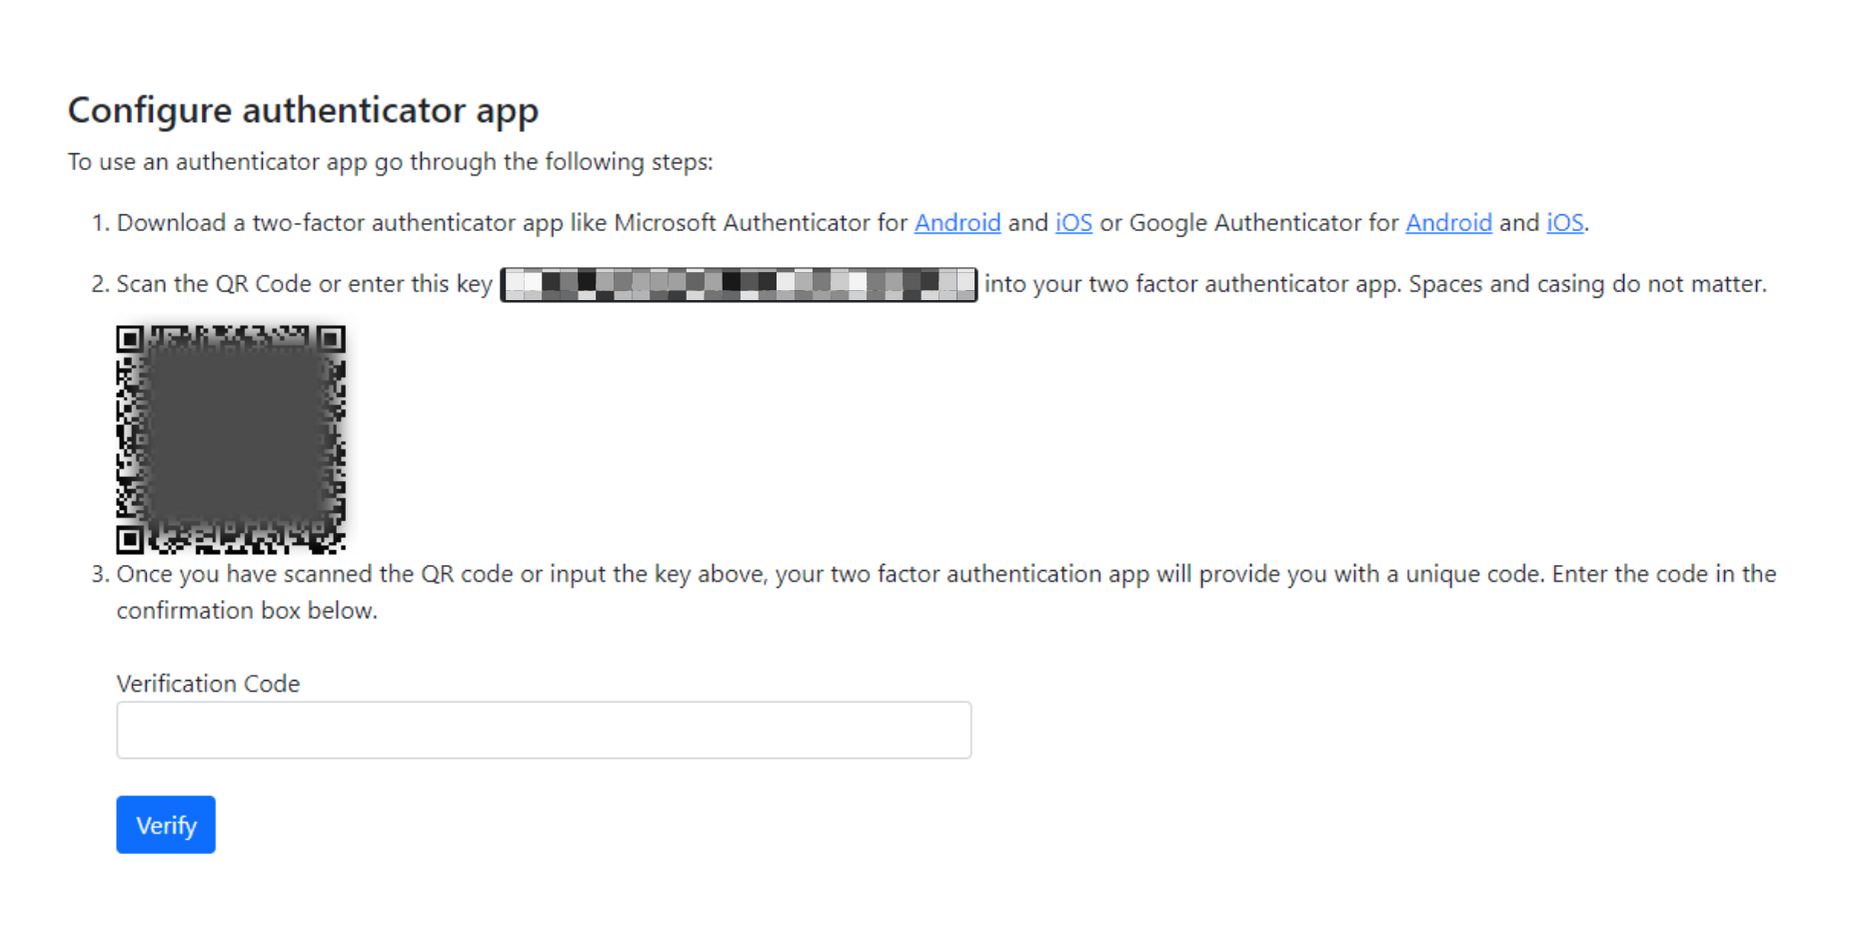
Scan the QR code or enter the key provided (it is not space or case sensitive). The authentication app will provide you with a unique code. Enter the code into the Verification Code confirmation box and click the blue Verify button.
You will now be able to securely use the app and Xero Login option.
Click the Back home link in the top right corner to return to the dashboard and finalise the setup process.
Click on the Green Setup Complete! Let’s Start button to start adding clients.

Add Yourself as a User #
The first client you should add is yourself.
Setting yourself up as a client allows you to switch between firm view and client view with ease. If you need to check what forms will look like, you can send one to yourself and view it easily. You will be better able to help your clients if you are familiar with what the client area looks like.
All you need to do is sign up as a user with the same email address and phone number that you used when signing up for Seamlss. Log out, then log back in.
See our guide for more detailed steps on this process.
Add Your First Client #
Now that your firm is all set up, it’s time to start adding clients.
Click on Clients in the menu on the left-hand side. You can add clients individually by clicking Add your first client now. To perform a bulk import of existing clients, click import your existing clients.

Additional Organisation Settings #
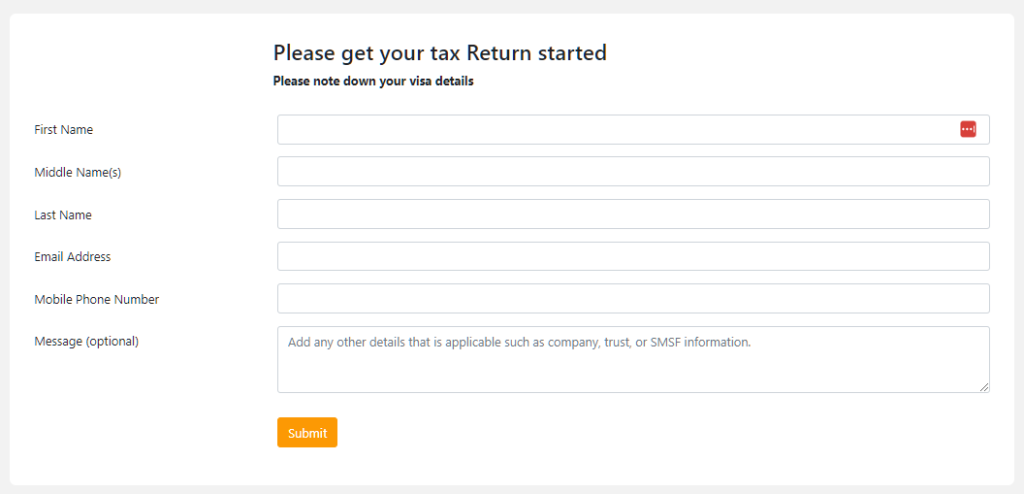
Click Create a Lead Link to generate a link that invites clients to register their details with you to begin the onboarding process. You can also find it by going to the General tab in Settings.

This link can be shared on your website, in emails, and on social media to make sharing your firm easy.
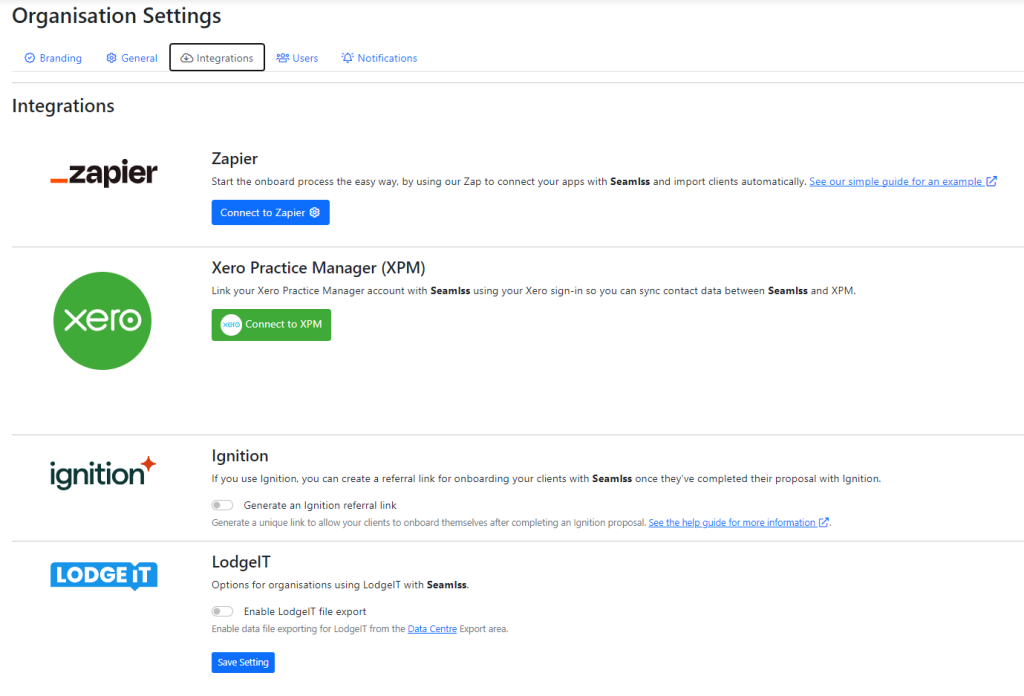
Click Zapier integration to connect Zapier and allow lead data to flow to your firm’s Seamlss dashboard automatically.
For more integration options, go to Settings in the left-hand menu, and go to the Integrations tab. From there you can connect Xero Practice Manager and customise an Ignition referral link.
Add Additional Users #
In the Users tab, you can add extra users to give them access to your firm’s Seamlss dashboard. You can choose to add them as either admins or staff members. Admins have greater access to the site and can make more changes.

That’s it! You’re ready to start using Seamlss.


