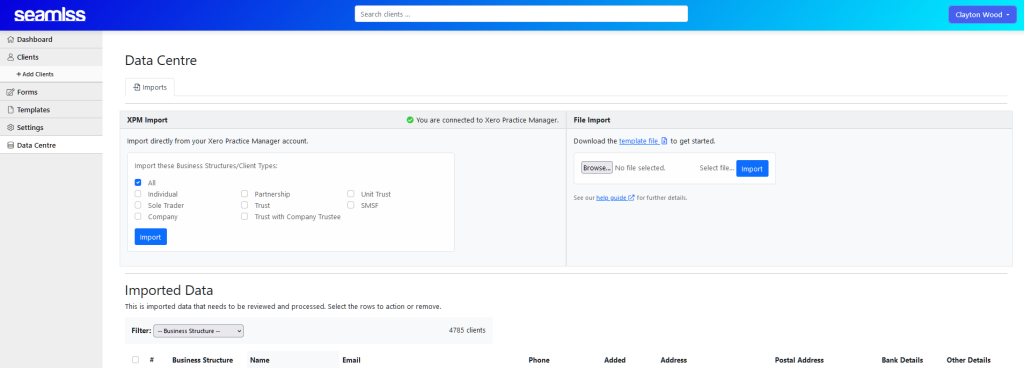
The Seamlss Data Centre makes it simple to import data about your clients from various sources your firm might be using. Once imported, it’s easy to link clients and entities together.

Download the Seamlss CSV Template file #
Data can be imported from various sources, including Xero Practice Manager (XPM), MYOB, and Handitax.
To get started, navigate to the Data Centre page in Seamlss. At the top of the page on the right-hand side is a link to download the template file. The template includes examples of each type of data set that can be imported into Seamlss.

Once you have downloaded the template, you will need to fill it with your own data and save the file.
Click Choose file to upload the pre-filled template, then click Import. You will be prompted to refresh the page to see the newly imported data.
Required fields #
Business Structure #
The Business Structure field is required for all imported clients. This column needs to display the correct entity type of each item in order to import correctly. The entity type may be one of the following:
- Individual
- Sole Trader
- Company
- Partnership
- Trust
- Trust with Company Trustee
- Unit Trust
- SMSF
Name, Email, and Phone number #
For Individual entities, the client’s name (first name, last name), email, and phone number are all required. The data will not import if these fields are not filled out.
For all other types, only the name field is required, although adding as much information as possible is recommended.
All other fields are optional, however, more data will always yield better results.
Import from XPM #
If you are connected to Xero Practice Manager, you can import clients directly through the section at the top left of the Data Centre page.

Simply select the boxes for business structures/client types you would like to import and click the blue Import button.
Adding Clients to Seamlss #
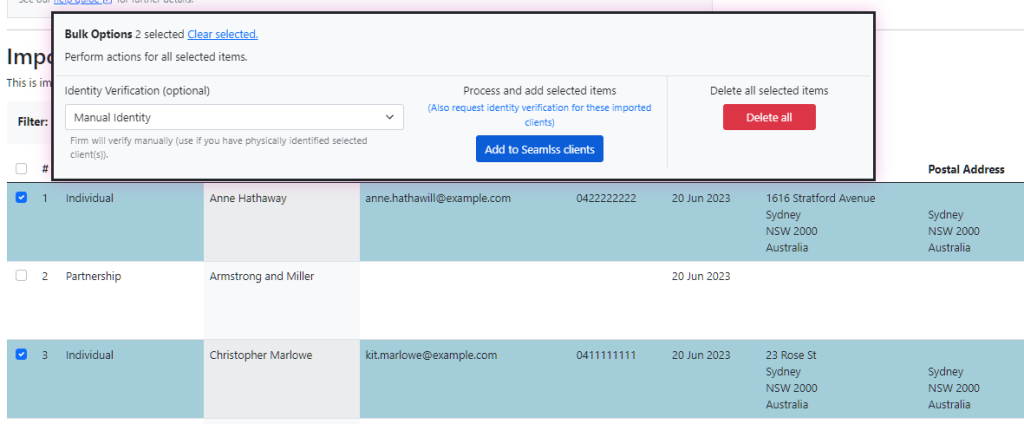
Once the data has been imported, you can add individuals to your Seamlss client list, or link other entities to individuals.
Tick the box next to the individual(s) you wish to add.
In the pop-up window, you will be able to select the identity verification you wish to use (if any) from the drop-down menu.

Click Add to Seamlss clients.
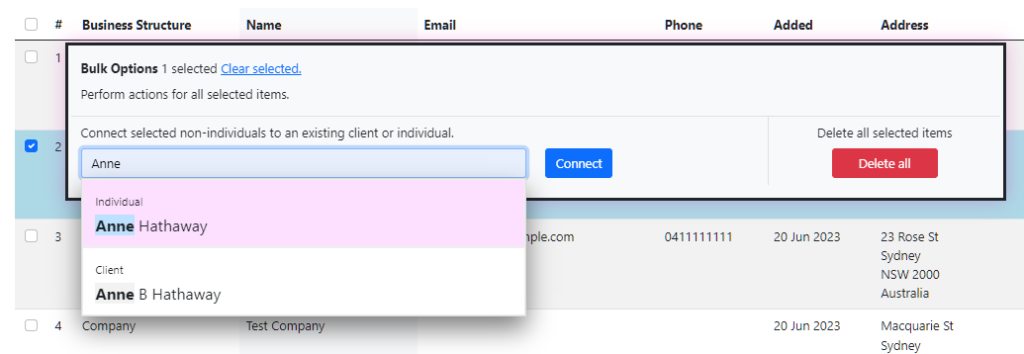
Linking entities #
To link an entity to an individual tick the box next to the entity or entities. In the pop-up window, start typing the name of the individual into the search bar. Select the correct individual and click Connect.


