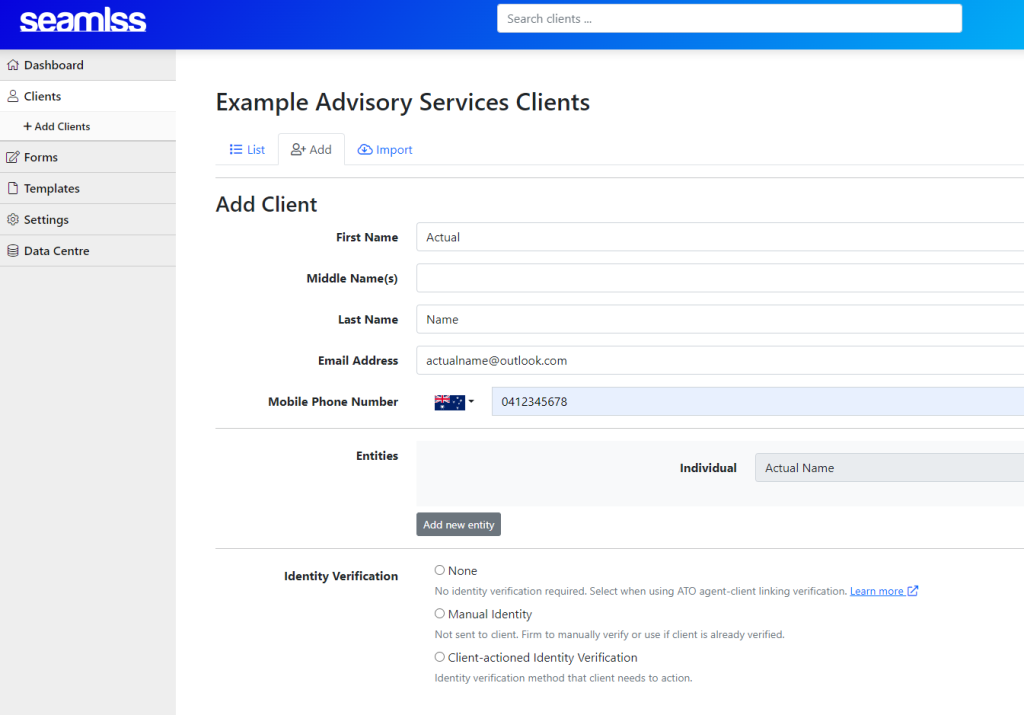
Upon your first registration, you will find a blue link on the screen requesting you to add your first client. For all subsequent clients, you can click the +Add Client button on the left-hand side of the screen, then go to the tab marked +Add.

Enter the client’s basic details — first name, last name, email, and phone number are all required to get started.
Next pick the entities you need to request from the client, if you’re not sure just start with Individual.
Click Add new entity and select the entity type from the drop-down menu. Fill in the name of the entity and click Add+.

Requesting a Company, Trust, SMSF, or Trust with Trustee company will require the client to complete extra steps to finish onboarding. Only do this if you have confirmed the client has those entities.
You can always request more data on more entities from the client at a later date.
ITR and Fetch Forms #

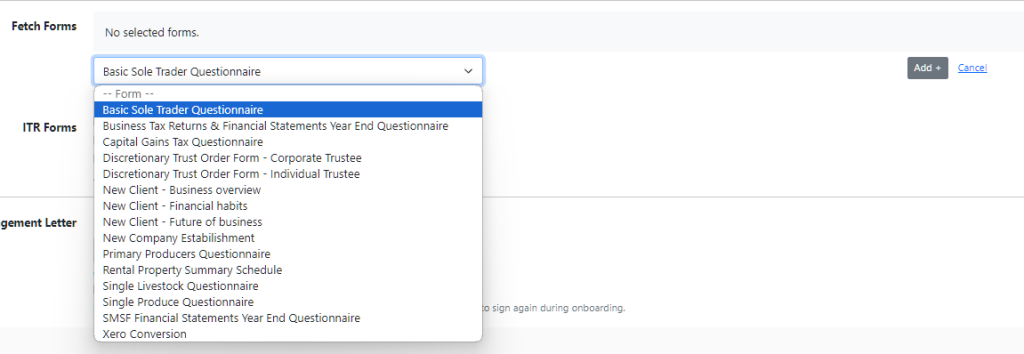
Click Add custom form to send a fetch request to a client when they onboard. Select the desired form from the drop-down menu and click Add+. You can add as many fetch forms as you like to the onboarding request. If you accidentally add an incorrect form, simply click the blue Remove button.

If you would like to request data and documents from clients to prepare their individual tax returns, tick the ITR box to request tax return data to be completed by the client.
Engagement Letter #
By leaving this unticked, Seamlss will automatically add the client’s name and all their entities to the bottom of the engagement letter. At the end of the process they will be asked to sign the letter electronically. The engagement terms are set out in the Engagement Letter template.
If you do not require an engagement letter, tick the skip engagement letter box. You may do this if you already have a signed letter or will be requesting an engagement letter signed via a proposal later. If this client has already signed an engagement letter tick this option so they don’t have to sign again during onboarding.

Send Request Now #

Tick Send Email Request to Client. The email will contain your standard welcome message, along with a button invitation to enter their data into your branded Seamlss portal.
If you do not tick this box, the client will NOT receive their invitation to onboard.
Click the blue Add Client button to send the request.


