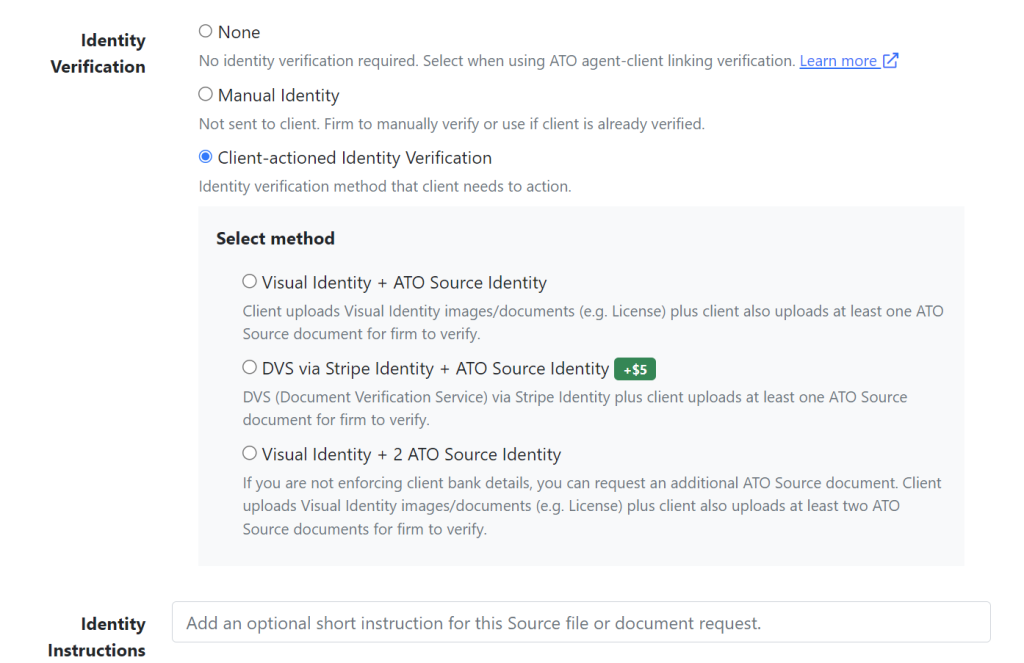
When adding a client to onboard in the “add client” page, select None, Manual or DVS via Stripe to request identity documents from the client. See the image below.
Ensuring your client’s identity is verified in compliance with the latest ATO requirements is crucial for maintaining security and trust. This guide will help you through the process using Seamlss.
Select Verification Method #
Seamlss offers three methods for client verification:
- Visual Identity + ATO Source Identity
- DVS via Stripe Identity + ATO Source Identity
- Visual Identity + 2 ATO Source Identity

Click Create Request: Use Seamlss to send the onboarding request to the client, specifying the required documents.
Step 2: Client Completes Onboarding #
Clients will receive an email prompting them to upload the necessary documents based on the selected verification method.
Step 3: Admin Verification in Seamlss #
- Log into Seamlss: Navigate to the client verification section.
- Select Document Type: Choose the document type provided by the client.
- Document Sight Method: Select how the document was sighted (Electronically, In Person, Combination).
- Document Confirmation: Confirm that the documents are clear, legible, and match the client’s details.
- Mark as Verified: Once all checks are complete, click ‘Mark as Verified’.


Detailed Verification Methods #
Visual Identity + ATO Source Identity
- Step 1: Client uploads a visual ID (e.g., driver’s license).
- Step 2: Client uploads one ATO source document (e.g., Notice of Assessment).
DVS via Stripe Identity + ATO Source Identity
- Step 1: Client uses Stripe Identity for DVS.
- Step 2: Client uploads one ATO source document.
Visual Identity + 2 ATO Source Identity
- Step 1: Client uploads a visual ID.
- Step 2: Client uploads two ATO source documents if not enforcing bank details.

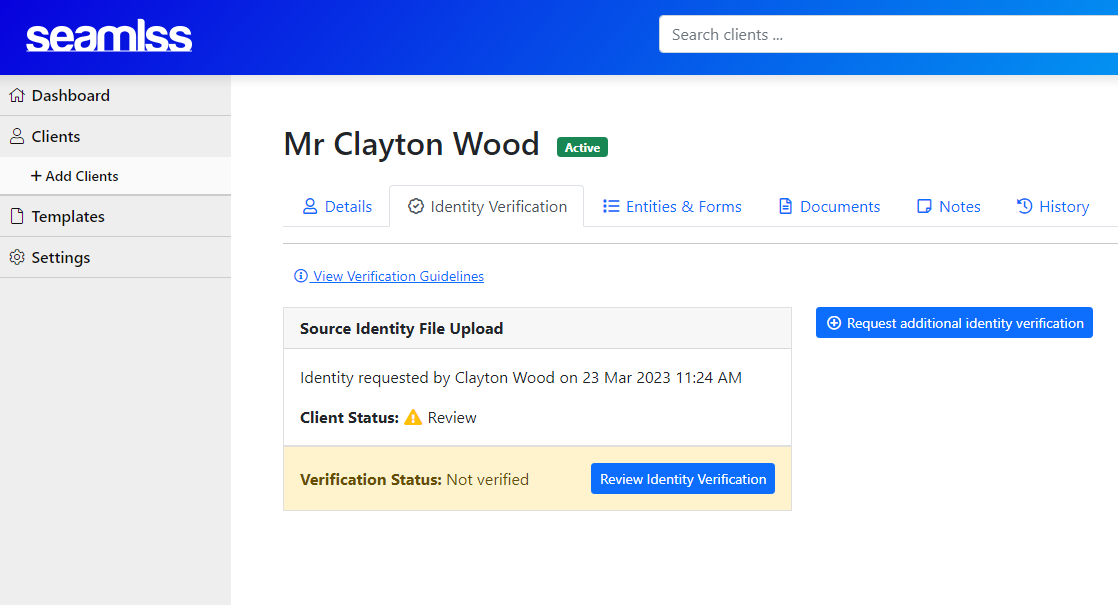
As per below the client is now Verified and logged in Seamlss.

Reference List for ATO Verification Methods #
Source ATO Method #
Step 1: Use Seamlss to get your client’s permission to link them using their TFN and DOB or ABN and name.
Step 2: Once collected, verify that the name your client provided matches the name on ATO systems.
Step 3: Verify 2 further pieces of information against ATO systems that were collected during the onboarding verification process. Acceptable information includes:
- Bank account details
- Details from an ATO-generated notice or lodged return
- Notice of assessment sequence number or reference number
- Activity statement document identification number
- Correspondence reference number
- ATO account details
- Recent account balance (information provided by the client can be close, typically plus or minus 5%)
- Amount of any refund, payment, or interest (general interest charge/shortfall interest charge) imposed (information provided by the client can be close, typically plus or minus 5%)
- Amount and frequency of a payment plan
- Pay as you go instalment amount or rate
- Gross payment or tax withheld from income statement
- Reportable super contributions
- HELP balance (a zero-balance value is not acceptable)
- Information specific to the client, including:
- Name and membership number of super fund
- Private health insurance membership number.
Source DVS Method #
Step 1: Ask your client for their name and DOB or address.
Step 2: Access via your DVS provider and verify the client’s name and DOB or address against 2 separate government identity documents. At least one must be a primary identification document as stated in the TPB Practice Note 5/2022.
When using DVS, you can record the Verification Reference Number (VRN) as part of your record-keeping notes for recording client verification.
Client-to-Agent Linking #
Ensure you have completed the client-to-agent linking process to maintain compliance and streamline your workflows.


