Bulk Exports #
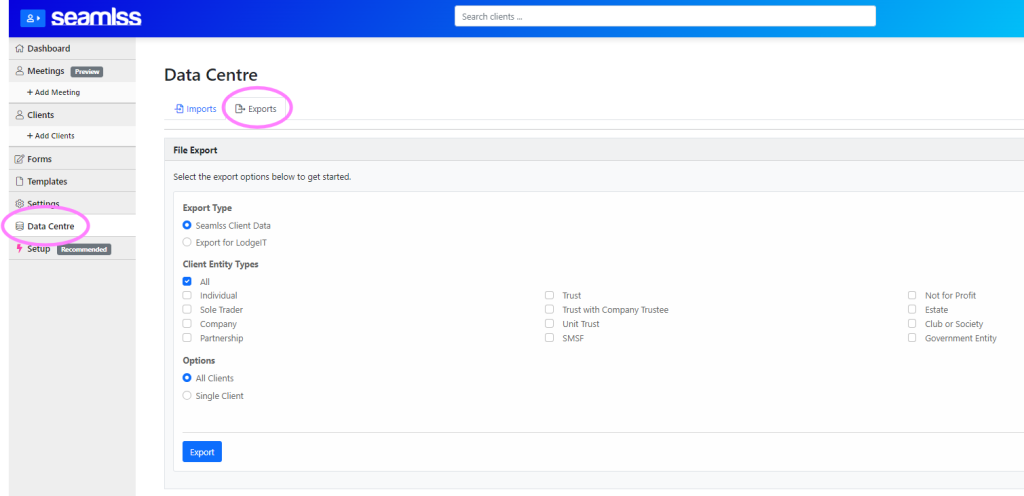
To start exporting client data, go to the Data Centre from the menu on the left-hand side, then select the Exports tab.

Select your Export Type. You can choose between Seamlss Client Data or Export for LodgeIT.

Next, under Client Entity Types, tick which entity types you would like to export. You can select All, or tick as many other specific types of entities as you would like. Just make sure to untick All if you only want to export certain entities.

Under Options, select All Clients.

Click the blue Export button. The data will be exported as a CSV file.

When the export is finished, a green confirmation bar will appear.


Single Client Exports #
To export data for a single client, follow the same instructions as for Bulk Exports, but under Options, selects Single Client.

Type the client’s name into the search bar. As you start typing, applicable clients will appear in a drop-down menu.

Click on the name of the client you wish to choose.

Click on the blue Export button. The data will be exported as a CSV file.

When the export is finished, a green confirmation bar will appear.

To learn about Importing clients, check out the help page here.


