Push client data to XPM using Seamlss.
Make sure your firm’s Seamlss account is connected to XPM. Find a client you want to import into XPM.
Using the Search function at the top of the page you can quickly go to a client’s details page.

Click on the green Push to XPM button.

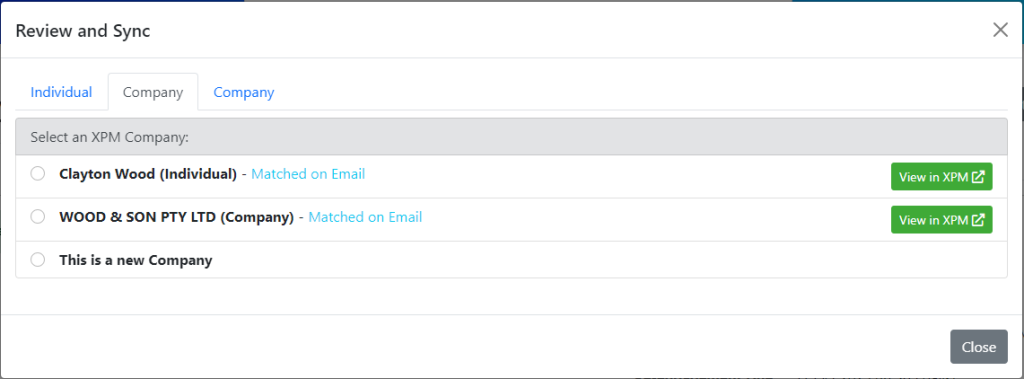
The system will search your XPM account for profiles that match the client’s details on Seamlss.

Select the correct client, or choose This is a new _______ (entity options will vary).
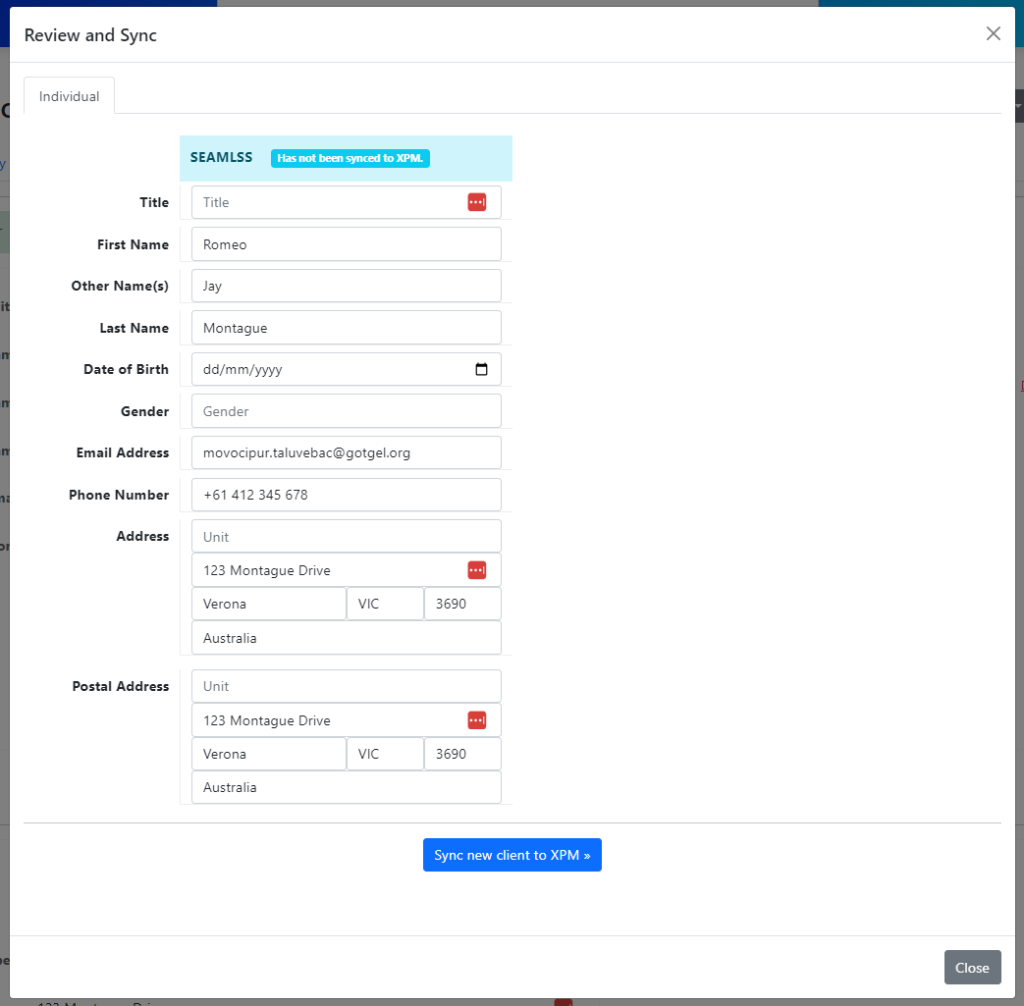
For a new entity, review the data displayed.

Click the blue Sync new client to XPM button to send data to XPM as is.
If successful you will be notified and be able to click on the link to view the client’s data in XPM or Seamlss.
If the sync failed it will not be pushed to XPM. This will happen when the client has not been fully onboarded.
For an existing entity, review the details and decide if you want to push any data to, or pull any data from, XPM.

Click the blue Sync and merge with XPM button.
You can also click the red Unsync button to stop syncing with XPM.


